Showing posts with label Sarah Chiu. Show all posts
Showing posts with label Sarah Chiu. Show all posts
Saturday, April 26, 2008
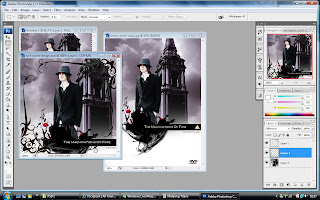
CD Design Print Out
Ben and Shakel had already designed the Front and Back Cover of the DVD cover, therefore with their images they had used I put together their designs into one and decided to print that onto a DVD to make it look more like a DVD game.

Thursday, April 24, 2008
Compiling The Flash File #4
 Shakel had updated his dumpster scene and so I was then able to put this into the Final Flash file as well. As this was the last scene that needed to be put into the Flash file I did come across a few problems where the buttons did NOT work and therefore had to fix, eventually I did find the problem and managed to fix them. They are now in working order.
Since I'd put all the Flash files into one Final Flash file I had to run several tests to make sure all the buttons worked and all the video's ran smoothly without the audio attached.
Since I'd completed it, I was to pass on the file onto Ben and Shakel to put the Audio into it.
Since I'd completed it, I was to pass on the file onto Ben and Shakel to put the Audio into it.
Friday, April 18, 2008
Compiling The Final Flash Files #3
 Each team member got assigned to do at least ONE interview scene, since Sharon had already completed one, we all used her's as a template to quicken the workload and if needed we changed the background, character and the text. Shakel did Suzy and Shax Interview Scenes.
 Since I'd already done quite a few scenes on Flash we all came to the agreement that I would just do ONE interview scene. Therefore, I chose to do the Bus Drivers Interview Questions.
 Since Ben had done the 'Intro' scene and the 'Walking out and to the Museum' scene we thought it would be best if he did the Security Guard Interview Question since that was what we wanted the game to follow on to.
 Sharon had already done one Interview scene, Janitor's, therefore we let her do another Interview scene and she chose to do the Shop Keepers Interview Questions.
When compiling all the interview scenes together into one Final Flash file I came across a problem where object and file names were the same and therefore wasted quite a lot of time going through each team members Flash files and renaming the objects and file names so we all had different file names and they wouldn't over-write one another when putting it all into one Flash file.
Wednesday, April 16, 2008
Bloopers Background
These are screenshots of the process of making the background for the 'Videos' scene in the Bloopers section.
 Again, I was experimenting around on Photoshop and really liked the effect it turned out and so therefore decided to use it as a background but since the background was too bright and I couldn't find any text that was suitable.

Therefore I created another layer and put a gradient effect on it with the gradient tool on Photoshop, then I experimented with the brushes I had on my Photoshop as well as getting more from DeviantArt.Com and came out with the above effect which I thought was pretty nice.
 Again, I was experimenting around on Photoshop and really liked the effect it turned out and so therefore decided to use it as a background but since the background was too bright and I couldn't find any text that was suitable.
Therefore I created another layer and put a gradient effect on it with the gradient tool on Photoshop, then I experimented with the brushes I had on my Photoshop as well as getting more from DeviantArt.Com and came out with the above effect which I thought was pretty nice.
 I then lightened the whole picture as I thought it'd be too dark and the viewer may get distracted by constantly looking at the background when we want them to mainly focus on watching the videos that we had in the 'Bloopers' 'Video' section.
 This is what it looks like when I placed it into my Flash application and thought it was just right and with the buttons placed in between the pictures.
Flash Bloopers Video Scene
When coming to create this video scene because I didn't know how to go about making one I again went online and researched to see what type of video galleries there were but couldn't find many.
I found 2 tutorials, one of them I really liked but it looked difficult to make it myself in Flash and since I didn't want to waste time I opted to do the other tutorial I found on Oman3d.Com as it was much simplier to understand and create.
Given more time I probably would've tried to look around on the internet for more video gallery templates/tutorials.

I found 2 tutorials, one of them I really liked but it looked difficult to make it myself in Flash and since I didn't want to waste time I opted to do the other tutorial I found on Oman3d.Com as it was much simplier to understand and create.
Given more time I probably would've tried to look around on the internet for more video gallery templates/tutorials.
 This was the one I really liked [found from CommunityMX.Com] and wanted to use in the flash application but when I came to playing around with it I found out that the components it used was from ActionScript 3 and weren't available on ActionScript 2. Therefore, even though I managed to get it working I couldn't use it on our own Flash application anyway since we were using ActionScript 2.
This is the flash video gallery I created with the help of the tutorial from Oman3d.Com. I didn't find it difficult to make but I do find it messy with all the thumbnails of the videos, I'd much rather prefer adding either a ComboBox, or make an invisible scrollbar like I'd seen in some of the picture galleries I came across, but since I wanted to get on with other area's of Flash I thought I'd leave it and if I have any time at the end I'd try adding one on.
Monday, April 14, 2008
Flash Photo Gallery Scene
I suggested we'd make 2 scenes of our "bloopers" that occurred whilst we created the interactive Flash application game, 1 scene to be a picture gallery and the other to be a video gallery. Therefore I set about researching online how to do it and eventually found a few free templates on Flashmo.Com. So I decided to play around with all the ones which I liked to see which looked best for our project.
 The above was the 1st choice. I liked this photogallery as I thought it'd looked pretty cool and wasn't that easy to navigate though you couldn't see all the photo's and would only know if you reached the end judging by the numbers stated at the top of the middle picture.
 The above was the 2nd Choice. I liked this because you can see all the pictures that are in each photo gallery page and also I was able to separate the photos into different categories by placing them into different gallery pages, which I thought was really handy and less messy especially when we had quite a lot of photos to place here.
 This was the 3rd choice. I liked this as there's a horizontal scrollbar, which automatically scrolls once you have the mouse over it, though to use this one I needed to re-size alot of the photo's and duplicate them to make thumbnails which meant I'd need to re-size them to a smaller size again. Therefore, I found this one time consuming and again all the pictures were on show but time consuming when it comes to sorting out the photos into "categories".
In the end I chose the 2nd choice as that was although time consuming as well [duplicating the pictures and alot of re-sizing needed] I loved the fact that I could categorise the photo's into different galleries.
All the above are templates from FlashMo.Com
 The above was the 1st choice. I liked this photogallery as I thought it'd looked pretty cool and wasn't that easy to navigate though you couldn't see all the photo's and would only know if you reached the end judging by the numbers stated at the top of the middle picture.
 The above was the 2nd Choice. I liked this because you can see all the pictures that are in each photo gallery page and also I was able to separate the photos into different categories by placing them into different gallery pages, which I thought was really handy and less messy especially when we had quite a lot of photos to place here.
 This was the 3rd choice. I liked this as there's a horizontal scrollbar, which automatically scrolls once you have the mouse over it, though to use this one I needed to re-size alot of the photo's and duplicate them to make thumbnails which meant I'd need to re-size them to a smaller size again. Therefore, I found this one time consuming and again all the pictures were on show but time consuming when it comes to sorting out the photos into "categories".
In the end I chose the 2nd choice as that was although time consuming as well [duplicating the pictures and alot of re-sizing needed] I loved the fact that I could categorise the photo's into different galleries.
All the above are templates from FlashMo.Com
Tuesday, April 8, 2008
Credits & Creators Backgrounds
After creating the 'Credits' scene and the 'Creators' scene I thought they looked a bit too plain and boring therefore I decided to make a few backgrounds for them.

The above shows the 'Credits' scene and with the background on.

The above shows the 'Creators' scene and with the similiar background on. As you can on the above printscreen shot that the images of the people are much bigger than the ones in the 'Credits' scene. I tried my best to make them look as similiar to one another as each other but due to experimenting around I didn't actually remember what types of brushes I used, etc.
 After playing/experimenting on Photoshop I liked the above idea and decided to stick by that idea. But because I lost that original copy I had to remake one which didn't turn out as good (as seen on the 'Creators' scene.
The above shows the 'Credits' scene and with the background on.

The above shows the 'Creators' scene and with the similiar background on. As you can on the above printscreen shot that the images of the people are much bigger than the ones in the 'Credits' scene. I tried my best to make them look as similiar to one another as each other but due to experimenting around I didn't actually remember what types of brushes I used, etc.
Monday, April 7, 2008
Compiling The Flash File #2
 Ben had done some more of his Flash work therefore I added it onto the Final Flash file. He'd created the scene where the Detective walks out of his office and to the Museum scenes.
 He'd also done the part where the Security Guard tells the 'user' the password.
Choose Suspect Scene Update
 There is already a screenshot of the 'Choose Suspect' scene shown above but the characters were still in colour instead of Black & White therefore the above is an updated version.
 I also got told to add in the 'Walking' videos we had already filmed before for each character and I found that when adding each characters 'walking' video it took up quite a lot of keyframes the timeline but since I didn't know any other way to change this I left it as it was.
 Ben wrote up the script for each character so that once the video ended there'd be a little "story" as to what happens after and whether the person playing the game has chosen the right "murderer" or not. At first when inputting the text, it came up all at once and seemed rather boring therefore I made it so the text 'typed' onto the screen instead, which did take up quite alot of time but the end result looked so much better than it did before.
 After the person has read the little 'What happens next?' "story" we put in a video of Ben in before making the credits come out.
Monday, March 31, 2008
Starting To Compile The Flash Together
 Since we had already created the 'Intro' scene and the 'Menu' scene we decided to start putting the Flash together into one Flash file. We chose to place everyone's Flash files into Ben's Flash file since he had the 'Intro' scene on his file and it'd be easier to move everyone's scenes into his.
 Since Sharon had completed one of her 'Interview' scenes we decided to put that into the final Flash scene as well since we were placing everyone elses Flash files into separate scenes as that'd be easier and would make the timeline less messy and not as long since we had quite a few video's to put into the Flash application.
Wednesday, March 5, 2008
Flash Application
So after all the picture and video editing we're finally able to start our flash, here are some screenshots of the process.


Sunday, March 2, 2008
Saturday, March 1, 2008
Production Progress #2
We booked another session in the blue screen room to take more of the scenes that will be included into the project.
We managed to get 2 extras to help us with the project, and they were Sarah's cousin, Josephine Lee, who again helped us take some photos and Shakel's brother.
This week we've managed to get alot of work done, from editing photos and videos and getting more video scenes and photos taken.


We managed to get 2 extras to help us with the project, and they were Sarah's cousin, Josephine Lee, who again helped us take some photos and Shakel's brother.
This week we've managed to get alot of work done, from editing photos and videos and getting more video scenes and photos taken.
Monday, February 25, 2008
Interface Main Menu Design Ideas
I decided to make draw and design ideas for the main menu part of the project for when we come to make the flash application. I've done hand designs of it and also a computerised design of it.
The first design idea is basically a close up of a door with the detective's name and the links underneath with a picture of the detective in the background like its a window looking into the office.
The second design idea is where the detective is walking closer and closer to the viewer and as he walks each link pops up.
The third design idea is where the title 'Detective X' fades in with a shadow effect applied to it then the following 4 characters come onto the scene with the links above each person.


The first design idea is basically a close up of a door with the detective's name and the links underneath with a picture of the detective in the background like its a window looking into the office.
The second design idea is where the detective is walking closer and closer to the viewer and as he walks each link pops up.
The third design idea is where the title 'Detective X' fades in with a shadow effect applied to it then the following 4 characters come onto the scene with the links above each person.
Friday, February 22, 2008
Production Progress
We booked the blue screen room out to film some parts of the project and here's some photos to show our working progress as we go on.
Josephine Lee, Sarah's cousin, came in to help take photos. The 2 slideshows are pictures that we've all taken.


Josephine Lee, Sarah's cousin, came in to help take photos. The 2 slideshows are pictures that we've all taken.
Tuesday, February 12, 2008
Royal Armouries Trip
 As a group we decided to make a trip to the Royal Armouries to take photo's for our project, and so we met up at 1030am and went around Royal Amouries taking numerous amount of photo's to use for our project.
We got some really good ideas and pictures that we'd like to use in our project, and here are some of the photo's we took. I've only uploaded a few as we took far too many to upload them all.


Wednesday, February 6, 2008
Typography Research
We decided to do some typography research to see what types of font there is and which one suited our project best.
This research was done by Sarah Chiu and Sharon Bains, the first typography picture was done by Sarah Chiu.


This research was done by Sarah Chiu and Sharon Bains, the first typography picture was done by Sarah Chiu.

The second Typography picture was done by Sharon Bains . Here are some examples of Grungy and Noir style fonts that could possibly be used in our game -

Tuesday, February 5, 2008
Research - Film
Detective Conan Live Action Movie - Japanese (Taken from: http://thegeekwithin.com/uploads/JDoramaPictures/)
Male Detective
High School Student
Receives an anonymous challenge letter from a person named "Kidnapper" who states they will kidnap one student whom he has to save within a time limit before kidnapping another student with yet another time limit.
 (Taken from: http://thegeekwithin.com/uploads/JDoramaPictures/)
Male Detective
High School Student
Receives an anonymous challenge letter from a person named "Kidnapper" who states they will kidnap one student whom he has to save within a time limit before kidnapping another student with yet another time limit.
Research - Games
Detective Research - Nintendo DS Lite Games

Girl detective - types of cases:
Touch Detective Touch Detective 2
 Touch Detective 2
Girl detective - types of cases:
TOUCH DETECTIVE CASES
- Robbery
- Deception
- Recollection
- Invasion
TOUCH DETECTIVE 2 CASES
- Robbery
- Disappearance
- Stranded
- Assault
- Office
- Condominium
- Department Store
- Museum
- Mansion
- Forest
- Shopping Plaza
- Circus
- Planetarium
- Park
Monday, February 4, 2008
Final Ideas Mindmap
After doing the brainstorm of ideas, we came to do a mindmap of our final ideas.
The first image is just a basic screenshot of the mindmap I was doing.
[Click on the picture to see it more clearly.]


The first image is just a basic screenshot of the mindmap I was doing.
[Click on the picture to see it more clearly.]


Subscribe to:
Posts (Atom)